Beaux R'eves

Monday, December 30, 2013

My Favorite Statement Chairs

I was recently contacted by a representative 
at One Kings Lane to help introduce 
I Adore OKL and have shopped there for everything 
from dishes to furniture, 
so of course I was thrilled to help!  
They wanted me to do a write up on 
my favorite Statement Chair in my home.  
Hmmmm, that was harder than I thought. 
So what the heck, I've included many of my favorite chairs 
for you all to look at. 
What exactly IS a Statement Chair?  
Well, that's where the Resource Guide 
at One Kings Lane comes into play.  
You can go there and read some really great articles on 
design, styles and periods of furniture.  
 They have a great article on Statement Chairs  
and explain that they are just that: 
Chairs that make a statement!  
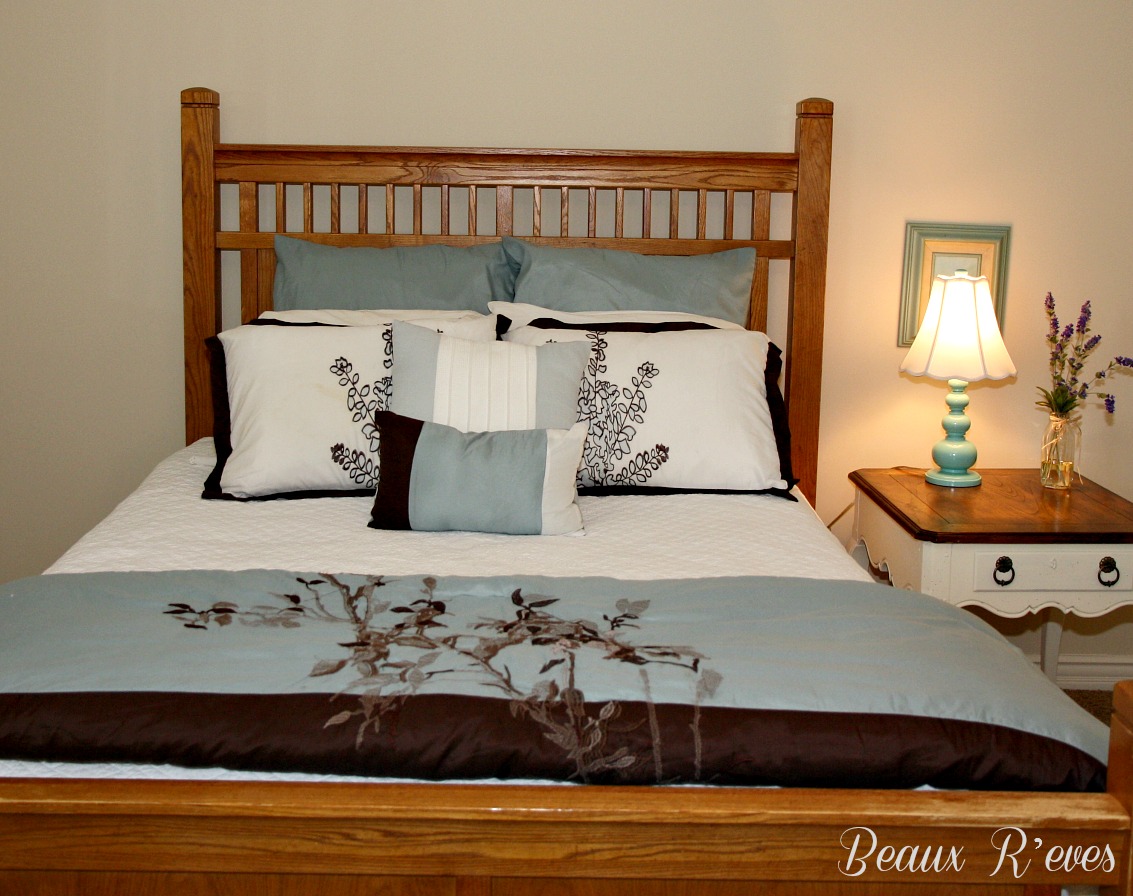
You remember Delilah pictured above?  
I found her at an Estate Sale for $55.00.  
Why does Delilah fit the bill as a Statement Chair?  
She adds just the right pop of pattern in an otherwise patternless muted bedroom.  
Delilah pulls everything together 
to make just the statement I was after.  
If you looked this chair up in the Resource Center 
you would find that it is a classic example of a 
Queen Anne Style Wing Chair. 
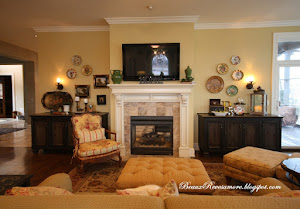
Here is another of my favorite Statement Chairs. 
I had so much fun choosing all of the fabrics to go in my 
Hearth Room and this chair was my pride and joy. 
What I love about this chair is that it makes 
a statement coming AND going.  
I absolutely love French Country style!  
The rush seat in this chair makes it a little less 
formal and more country.  
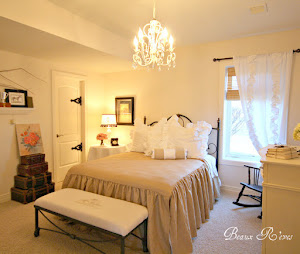
The last statement chair that I am sharing 
is one that got a makeover last year.  
Here is what it looked like "before" the makeover.  
Before I painted this chair it had more of a 
formal Empire Style to it.  
If you look in the Resource Guide under Empire Style in 
England: Regency Stye you will see almost this exact chair.  
After it's makeover it blends more into my Frenchy style.  

Head on over to One King's Lane  
 and check out their Resource Guide.  
 Just don't blame me if you get lost in the site for a couple of 
hours like I did.  

Until Next Time,
Beaux R'eves

Monday, December 23, 2013

More Christmas Decorating!

I thought I would share some pictures 
that I snapped of the Living Room before 
our Company Christmas party began.  
We decided to hold the party at our home this year 
in order to save money for the company.  
I liked the idea for two reasons; 
one~ it would get me motivated to get the house ready for 
Christmas, and two~ I thought it would be cozier than 
having the party at a restaurant or another venue.  
I did a big tree this year instead of the tabletop tree 
that I had last year.  
The color scheme this year is gold, white 
and a touch of aqua blue.  
Even though my tree has over 750 lights on it I added 6 
more strands so that it really shines at night!
The mantle this year is also very simple.  
Just layers and layers of greenery 
with a few sparkly touches added.  

Do you remember my mantle from last year?  
My Decor Steals Angel Wings!  
I love them but they didn't make it out this year.  
I reused the mantle piece that Mr. Beaux made for me last 
year to extend the depth of the mantle.  
 I layered garland that I already had along with new wispy 
garland that I bought at Nell Hill's 
I hung a pre-lit wreath in the center of the fireplace 
and tucked in a few birds and pinecones.
I love the movement of the pine branches from Nell Hills.  
Sparkly icicle garland and snowflakes 
make the mantle very wintery.
To add to my wintery Living Room, I reused my Dollar Store glitter house under a cloche.  
You can see the original post Here.  
Next to the fireplace I set this urn with greens 
and glittery ribbon and a silver gazing ball 
in the middle.  
The beautiful thing about decorations like this 
is that I can keep them out through January.
On the other side of the room the Wine Cabinet 
is set with a Wintery scene as well.  
Fresh flowers for the party sit inside a 
silver champagne holder.
Some of the elements from last years mantle now grace the top of the Wine Cabinet.  
For our Company Charity this year I organized 
to "Adopt-A-Family" 
through a great organization 
Operation Breakthrough.  
They help families in need in Kansas City all year long.  
The office had fun buying gifts for our "adopted" family 
and brought them to the Christmas Party.  

Giving back is what Christmas is all about.  
I hope you all have a Very Merry Christmas!
Until Next Time,
Beaux R'eves

Sharing with,

Friday, December 20, 2013

Beaux R'eves Christmas Home Tour

Happy Holidays!  
Merry Christmas!  
Are you all ready and set for the big day?  
Or, are you like me and in kind of a spinning flurry of activity trying to get the last minute details all finished?  
In my last post I promised you two things
~ A home tour of my home decorated for Christmas 
and a little more info on what 
I have been up to for the past months...
Let's start with the home tour 
and chat as we look at the pics.
BTW, I am watching 
"It's A Wonderful Life" 
as I am writing this... Such a classic!!!
I decided to go in more of a "classic" direction this year 
 for Christmas.  I found a beautiful Plaid ribbon that 
matched my Carolers that I have had forever.  
I used the plaid ribbon on the stair garland and kept it very 
simple and added some extra sparkle with a very cool 
ribbon from Nell Hills.  
 My BFF and I made a trip out after Thanksgiving 
 and found some fun things for holiday decorating.  
So, maybe you are wondering how the 
"house up for sale" all went?  
Well, we put the house up in April 
and had a lot of showings.  
Gee, isn't that a LOT of work!!!  
Clean, clean, clean, get out of the house, 
take the dogs with you...  
We did that for about three months 
and got a few bites but nothing serious 
so we took it off the market.  
We just didn't want to interrupt Miss Beaux's Senior year of High School with moving etc...
Aren't they the cutest little carolers?  
I love red plaid!  
I am looking for a new red plaid shirt right now 
to replace the one I shrunk in the wash!  
I found these guys when we lived in California.  
I won a silent auction bid for a little boutique near where we lived and they are what I picked out with my winnings.  


I put some greens and white flowers 
in this silver reindeer bowl 
that I picked up at an Estate sale,
I carried the Plaid into the dining room 
by adding the same ribbon 
to the the dining room table centerpiece.   
We held our Company Holiday Party here at the house so I had a lot of floral arrangements.  

Thanks for stopping by to see the Entry and the Dining Room come back over for the Living Room, and Kitchen Hearth Room next...

Until Next Time,
Beaux R'eves

 joining:

Tuesday, December 17, 2013

Outdoor Decor

What? 
A BLOG post? 
How long has it been? 
OK, let's not talk about it... 
Let's just move on from here and pretend
that I haven't been absent forever! 
I'm sure you are all wondering
what prompted my long sabbatical
(or maybe you aren't wondering). 
It was a combination of many factors;
having my house up for sale was one,
starting a full time office job was another,
and then just daily life thrown in with a Senior
in high school and lots of college visits. 

But I'm back and although I would like to think
that I can blog full time,
I realize that my time constraints
won't really allow for that. 
I am going to shoot for once or twice a week and see how that goes.  I will try to fill you in on all the details mentioned above as I blog but for now let's get to the fun stuff...
Decorating!!! 
  
I Love the Holidays! 
I wanted to try something new outside this year. 
I had seen the cutest urns on Pinterest last year and wanted to replicate them. 
They had taken large play balls,
you know the ones you see in the huge wire bins at
Wal-Mart, and spray painted them silver
and popped them(not literally) in an urn. 
Easy right? 
Well, not if you can't find the balls anywhere!!! 
Which reminds me of the Funniest story
that I HAVE to tell you!  
Mr. Beaux and I  were at The Wal-Mart in search of the play balls and we didn't see any.  He sees a Wal-Mart worker and inquires about the balls.  She was the cutest little elderly lady with her cute blue Wal-Mart vest. 
She gets on her walkie talkie and in the loudest voice says  
"Hey, do we have BIG BALLS?" 
OMG, we were DYING! 
 
So, this year I remembered to look for the balls in the fall before they put their seasonal toys away for the year. 
I spray painted them silver
with about three coats of spray paint. 
 I set a real greenery wreath from Costco on top of the urn.  
They run about $15.00 a piece and
will last most of the season outside. 
I wrapped ribbon around the spray painted ball and fashioned a pretty bow on top. 
Now, I bet you are probably wondering how the heck I am going to keep that shiny ribbon wrapped ball in that pot all season without it flying off to Nebraska! 
Yes, I did think of that too...
It gets pretty windy at my house.
So, I took a coat hangar and looped it through the ribbon at the bottom of the ball and stuck it into the dirt in the bottom of the urn. 
Problem solved. 
Up closer to the house I decorated the urns with lots of greens, pine cones and berries. 
Last year I bought branches with lights on them at Target.  This year I added to those branches with new more realistic lighted branches. 
It looks so pretty at night with everything lit up. 

In my next post we'll take a house tour...

Until Next Time,
Beaux R'eves

Joining,
 
 Savvy Southern Style for WOW 
http://www.savvysouthernstyle.net/ 


Tuesday, March 26, 2013

Darling Bench Makeover

This is a project that I actually finished last month 
during one of those many snowstorms that we had.  
And boy, we have had way too many of them lately!  
We still have about 6 inches of snow on the ground 
and I am pretty much over it!  
I can't wait for the real Spring to get here.  
I found this sweet little bench at an Estate Sale last summer.  
I was going to redo it and put it around the house somewhere 
but Miss Beaux took a liking to it 
so we redid it for her room.  
Here is what it looked like when I found it.  
It had been painted over many times but the details 
were so charming.  
The seat cover was dirty and the fabric was dated and pretty ugly.  
When I took off the first cover 
there was another even uglier 
brown fabric underneath.  
Oh, and a few spiders too!  
EEEeeeeeKKKK! 
I bought new foam at JoAnn's (without spiders)
and glued that onto the seat board.  
Then I staple gunned batting around the foam 
before I put the new fabric onto the seat. 
I had this dusty pink velvet left over 
from a client's pretty tapestry pillows a few years ago. 
I painted the bench in Paris Grey and waxed it 
with clear and dark wax.  
I did a fair amount of distressing to retain the old charm.  
 The bench seat is still awaiting the final touch 
of being permanently screwed into the bench 
but it will happen eventually.  
Once we tighten it down a lot of the bumps will disappear.
I love the way that it turned out 
and it looks great with her Shabby Chic bedding. 
Unfortunately, this is the most you will ever see 
of Miss Beaux's room.  
She is a teenager remember?  

Until Next Time,
Beaux R'eves
XO Cindy


Sharing at:
Kim at SavvySouthern Style for Wow Us Wednesdays  
 Judy at DIY by Design

Wednesday, March 13, 2013

Staging Bedrooms Part II

I promised you all a look at the other bedroom 
that I had finished staging.  
If you have not been following along 
I have been busy staging my house for sale this Spring.  
We have three bedrooms upstairs 
plus a room adjoining the boys rooms 
that they used for video gaming and homework.  
OK, who am I kidding?  
Mostly video games.  
When the boys went to college they left a skeleton of a room that we never changed.  
I wish I had taken a "Before" picture but I guess I didn't.  
This bed used to be angled in the corner of the room.  
It is a very large room so there was still plenty of space.  
Placing it against this wall makes the room 
look so much larger.  
I used bedding that I already had on hand.  
This was a "bed in a bag" set.  
I used a white quilt and folded down the comforter.  
This is a great staging tip to make 
the room brighter and lighter.  
This is the matching table 
to the one that is in the "Boys" room.
Here they are before I painted them in ASCP Old white.
And more painting!  
 This desk was the same wood as the chair but the top had a 
lot of scuffs and water stains on it.  
A little paint and it looks so much better.
I found these drapes at Lowe's on Clearance for $14 a panel.  
I knew they would be perfect for this room.  
I had this artwork in my storage area.  
It makes a statement without being overwhelming.  
I love the way it all looks together.  
Oh and I forgot to show you my favorite part of the bedding.  
I found these vintage pillow cases at an estate sale.  
So cute!
I placed this chair and vintage suitcases in here 
because the room is so spacious.  
And the colors were so perfect!
And here is a look at the room from the doorway.  
Total cost for this room was about $50.00
The door on the right leads into the "extra room".
Here is a peak into that room.  
Whew!  
I am almost finished with the whole house!  

Until Next Time,
Beaux R'eves
XO 

Linking up to:

Roeshel  at DIY Showoff    
Sherry at the No Minimalist Here Open House Party
Transformation Thursday at The Shabby Creek Cottage
 Courtney at French Country Cottage for Feathered Nest Friday
Heather and Vanessa at At the Picket Fence for Inspiration Friday
Debra at Common Ground for Vintage Inspiration Friday
Sherry at The Charm of Home for Home Sweet Home Friday

Jen at Tatertots and Jello for the Weekend Wrap-up Party

          Donna at Funky Junk Interiors for Saturday Nite Special